
Landscape photography is one of the most rewarding types of photography. There is nothing better than working hard, dragging yourself out of bed when everyone is sleeping, staying at a location after everyone has left, to create the image you have dreamt about making.
At the same time, it can be so difficult and disappointing too. I’ve lost count of the number of times that I’ve woken up at an insanely early hour, driven or hiked hours to THAT spot I had planned to shoot, only for the weather to not cooperate.
But, like anything rewarding in life, those great moments are the ones you remember and are what keeps me coming back over and over again to landscape photography.
Here are my 50 favorite tips to give you the best chance to create breathtaking landscape photos wherever you are in the world. Enjoy!
1. Sense of Depth is Your Friend

There are two ways you can use a sense of depth in your landscape photography. First, you can create a deeper depth of field by keeping everything in the image in focus from the foreground to infinity. This is the most common way to create depth and you can do this by using a smaller aperture such as f/11 to f/16. It keeps the image visually interesting as it allows your viewer to clearly see everything in the image.
The second way to use sense of depth as a creative tool is by using a shallow depth of field. One of my favorite ways to use this technique is to blur the foreground elements as a way to help frame the subject of the image. You can do this by using a larger aperture such as f/2.8 to f/4 and focusing on the focal point of the image. A shallow depth of field keeps the image visually interesting as it leads the viewer’s eye to the subject in the image.
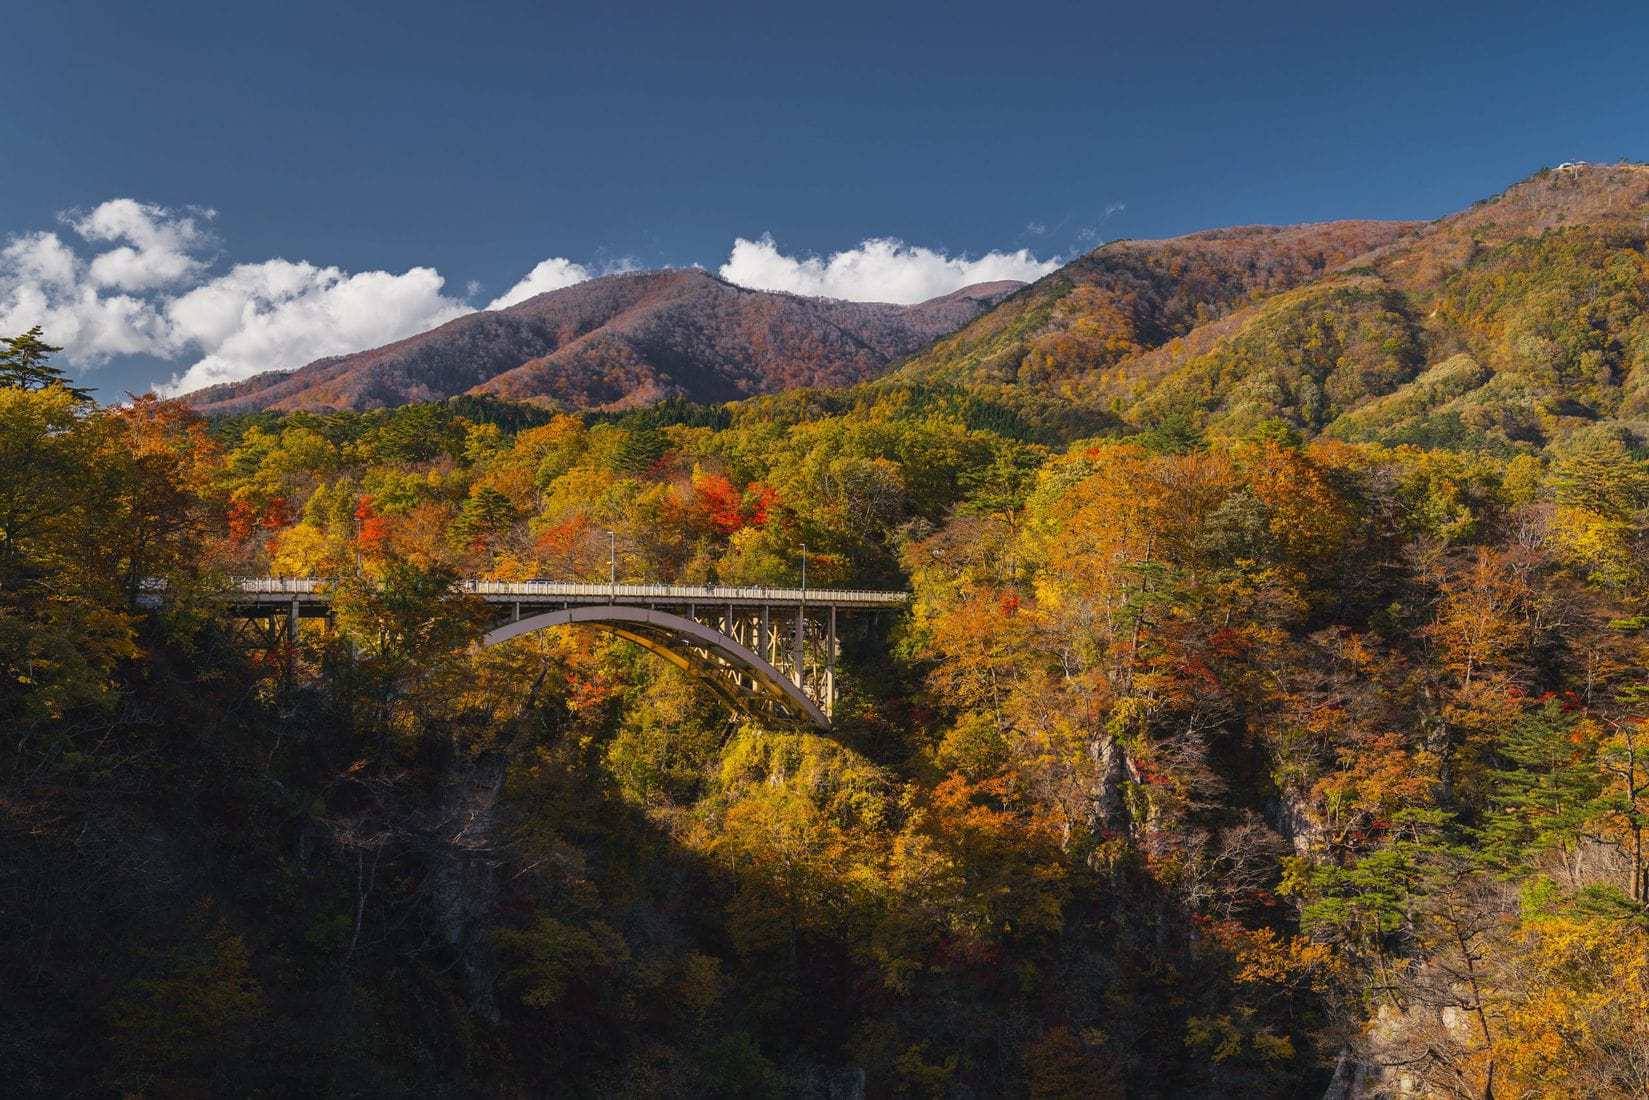
2. Use Layers in an Image to your Advantage

Similar to tip #1 another way to make your image more interesting is by using layers. One of the easiest ways to create layers is to have a foreground element in your photo which helps accentuate the subject of your image.
This could be flowers, rocks, leaves on a tree, or really anything else which is interesting in the environment you are in.
Another way to capture layers in the image is to accentuate what nature and the scene already give you. For example, in this image which I took at Sun Moon Lake in Taiwan, the boat dock and the mountains behind it already created natural layers.
All I had to do was compose it the way I liked and use a smaller aperture to keep most of the image in focus.
3. Going off of Tip #2, Find and Use Foreground Elements
Using a foreground element is such an incredibly easy way to make your image more interesting that I wanted to give it its own section to make sure you see it! So, next time you’re out shooting, instead of just taking the photo as you normally would, try to find a foreground element and include it in the image.
4. Use a Wide Angle Lens
A wide-angle lens can give you a very unique look and perspective. Obviously, it allows you to capture a wider view and fit more into your image.
However, the best way to use a wide-angle lens effectively is to get super close to your foreground element which will allow you to create that depth of field we have been talking about. In this image, I had the camera as close to the ground as I possibly could with the tripod.
I put together this article about my favorite travel lenses for the Sony a6000. Even if you don’t have a Sony E Mount camera, it contains a lot of good information on what to look for in a new lens if you’re in the market for one.
5. Don’t Underestimate the Power of a Good Zoom Lens
Using a zoom lens in landscape photography is a great way to create powerful imagery. Yes, you will not be able to fit everything in the image, but that’s the point. By focusing on a specific focal point and isolating the subject, you simplify the image and make it more interesting and powerful.
Another way to use the zoom lens is by compressing the image to create even more drastic layers.
Here is what I mean. In this image, instead of focusing on the entire cityscape, I chose to focus all attention on the Dubai Frame by using my zoom lens at its maximum range of 200mm.
In the image, you can also see how the zoom lens is compressing the buildings in the background allowing them to fill the Dubai Frame more than a regular lens would.
6. Use the Right Shutter Speed When You Don’t Have a Tripod
A good rule of thumb is to use a shutter speed that is equal to or faster than the focal length you are using. So, if you’re using a zoom lens and shooting without a tripod at 160mm, your shutter speed should be at least 1/160 or faster to offset little camera shakes.
Obviously, this is just a rule of thumb, and sometimes you will have to shoot at a slower shutter speed depending on the aperture you’re using and how much light there is, but this will help you decide what shutter speed is best.
7. Use a Polarizing Filter
Using a polarizing filter is one of the best ways to make your landscape photos pop. The polarizing filter will help reduce reflections in your image and will bring out the blues in the sky.
If you do use a polarizing filter, just remember that they are not good in all situations. When you shoot sunrise and sunset or want to capture a reflection, it’s best to take the filter off your lens.
8. Capture Movement
A great way to add energy to your image is to use slower shutter speeds to capture movement in the scene. Moving water or clouds are two of the most common elements in landscapes that you can try this with.
To capture movement, you’ll need to use an ND filter in most situations. In this image, I used a shutter speed of 1/25 and needed to use an ND filter in order to block enough light to use that shutter speed.
A fixed ND filter is your best bet for photography, but if you also shoot a lot of videos, a variable ND filter might be a good choice.
9. Capture the Reflection with Water
There is nothing more beautiful than capturing a perfect reflection in a landscape scene and showing the natural symmetry in the world. To give yourself the best chance of capturing a perfect reflection over a larger body of water like a lake, go there during sunrise or sunset. I have had the best luck at sunrise, but bodies of water can also be calmer during sunset.
10. Use People to Show Scale
One of my favorite ways to show a sense of scale in a landscape photo is by placing a person in the image. By doing this, you’re much better able to show how vast and epic the landscape is in a two-dimensional image.
11. Use the Rule of Thirds

The rule of thirds is one of the classic rules of photography and is always a good one to keep in mind. Either use the gridlines in your camera or imagine breaking your image down into vertical and horizontal thirds to make 9 total sections.
By placing your subject on one of the lines that intersect, your image will be more balanced making for a more interesting and visually pleasing photo.
12. Use Leading Lines

Another one of the classic photography techniques and a good one too. By using obvious or not so obvious leading lines in your landscape composition is a great way to lead your viewer’s eyes naturally through the image.
Take these two examples. In the first photo, I used the obvious leading line of the road to focus the viewer’s attention. In the second image, I used the water line created on the beach by the ocean waves as a more subtle leading line.
13. Don’t Forget About the Rule of Triangles
Similar to tip #10 and #11, this is another great photography technique to keep in mind. I’m not talking about actual, physical triangles, but implied triangles in the image.
By finding these implied triangles in the environment and using them in your composition, you will be able to create a sense of the relationship between the different elements in your image making it flow more naturally.
14. Learn to Use the Horizon Line to your Advantage
Where you place the horizon line in your composition can make a huge difference to the overall look and feel of your image. If you place the horizon line lower in the image, you will place more emphasis on what is located above the horizon such as the sky.
On the other hand, if you place the horizon line higher in the image, you’re giving more importance to the foreground in the image and less so on what is above the horizon.
15. Break the Photography Rules
Although the rules of composition like the rule of thirds, leading lines, triangles, and placing your horizon line that we just covered are good principles to remember, they are just that, guidelines to help with your composition.
Like any rules, they are meant to be broken and by breaking them you will better be able to find your own style and how you like to compose your images.
16. Scout Out the Location, Show Up Early and Stay Late
It isn’t always possible, but if you can, try to show up to the location at least 1 hour before you plan to shoot to scout out the location, especially if you’re shooting golden hour.
I can’t tell you how many times I had shot a location only to find a better spot later on. By showing up early and scouting out the area, you will give yourself the best chance to find the best composition possible AND catch the best light.
If you can’t get out to the location in person, try to do some scouting digitally either through Instagram or Google maps.
At the same time, make sure you stay late too if you’re shooting the sunset. Sometimes, the best images are created during blue hour after the sun has gone down.
17. Put in the Work
Along the same lines of tip #15, put in the work. Landscape photography is definitely not a lazy person’s game.
You will be rewarded for waking up at crazy hours when everyone else is sleeping to catch a sunrise or hiking up that mountain for those couple of shots. If it was easy, then everyone would have breathtaking landscape shots in their portfolio of work.
18. Shoot at Golden Hour
There is a reason why it’s called Golden Hour and why it makes for such beautiful landscape photos. The light is softer, more colorful, and more magical than any time of the day.
19. Shoot in Bad Conditions Too
Everyone is down to go out and shoot the golden hour when the weather is nice, but most people won’t go out when the weather is bad.
Don’t be like most people.
By going out in bad conditions, you can get incredibly moody landscape photos with a ton of atmosphere and character. Just make sure it’s safe out there before you go, though.
20. Don’t Limit Yourself to Only Golden Hour
Going off of #18, it’s important to not just limit yourself to golden hours even if it’s tempting to do sp. Just remember that good light can also appear at other times of the time. Sometimes on a cloudy day, the light will shine through the clouds creating a unique image.
Other times, you might find yourself walking through a forest flooded with streams of light in the middle of the day.
21. Remember that Patience is Key
Even if you do everything right and you have set yourself up to capture that epic photo, you STILL might not get the image you want or the weather might not cooperate.
This is what makes landscape photography so special especially when you do get the shot you had imagined. Just remember this happens to every landscape photographer and is part of the story of the image.
22. Use an App Like PhotoPills to Plan
So many things can go wrong in landscape photography. So, when conditions are right to capture the image you have dreamed of, you want to make sure you get the shot.
Using an app like PhotoPills can help save you precious time and make sure you get the photo exactly how you want. For this image, I used PhotoPills to plan out exactly what location and what time the sun would rise from which allowed me to capture a sun star through Melissa’s arms.
There was no way this would have been possible if I didn’t use PhotoPills because it was my first time shooting sunrise at this location.
23. Use a Tripod
It’s definitely not the most fun tool to carry around especially if you’re hiking into a location, but it is indispensable in many situations. You will almost always be better off using a tripod If you want to create depth by using a smaller aperture like f/9 to f/14 or you want to capture motion using slower shutter speeds.
24. Skip the Tripod
At the same time, go out and shoot without a tripod. Tripods are a great tool, but you tend to shoot differently when you have a tripod versus not having a tripod. By going out at times without a tripod, you will build on your skill as a photographer.
25. Try to Stick to the Lowest ISO Possible
This isn’t always possible, but try to stick to the lowest ISO you can depending on the situation you’re in as it will give you the best quality image with little grain.
To do so, you will have to balance out the low ISO with a slower shutter speed as you will most likely be using a smaller aperture. This is where a tripod will come in handy.
26. Take Time to Compose your Image
When you get to your location, don’t just shoot wildly away. Take some time (I like to take 5 – 10 minutes) to acclimate your eyes to the scene and then start to compose your image.
27. Learn to use the Histogram
Even though it’s intimidating at first, the histogram is a very important and easy tool to use that will give you a good understanding of how your image is exposed. There are differing opinions about how to use the histogram, but I like to expose my images to the right in order to get more detail in the shadow.
28. Shoot in RAW Format if you Can
It’s not 100% necessary, but shooting in RAW format will allow you to capture the most information from your scene and will give you greater flexibility in post-processing.
When you spend all that time capturing the image, the last thing you want to happen is to wish you had more data to play around with in post.
On the other hand, if you don’t plan on editing your photos or are just planning on sharing your photos casually, shooting in JPEG will work just fine too.
29. Post on Social Media

Sharing your work on social media, whether that be Instagram, 500px, Unsplash or any other platform is one of the best ways to grow and improve as a photographer.
You will not only be able to connect with other like-minded photographers, but you will also get to compare your work with others which will improve your photographic eye.
30. Change the Perspective
For the most part, people are used to seeing the world from a certain perspective through their daily lives.
So, as a photographer, if you can change the perspective you are shooting from, whether that is shooting from an extremely low angle or from a birds-eye view (if you have a drone), you will make the image more visually interesting.
If you are thinking about getting a drone but don’t have a big budget, there are actually pretty good quality drones under the $200 price point.
31. When you’re Not Sure, Use a Mid-Range Aperture
When you’re out in the field shooting, it’s sometimes hard to remember all the rules around what aperture to use. If you’re not sure, a good rule of thumb is to use the mid-range aperture on your lens as these are usually the sharpest. It does differ from lens to lens, so make sure to learn all you can about your lens before you head out.
Pro Tip: Be careful of shooting with a very small aperture as diffraction could occur which will decrease the quality of your image.
32. Try to Capture the Best Image Possible in Camera
Yes, modern-day digital cameras have incredible dynamic range and you are able to recover many of your mistakes in post-processing.
However, try your best to capture the best image possible when you’re shooting. This will build your skill as a photographer and it will save you countless hours sitting in front of your computer editing.
33. Shoot Film

There is no better way to improve your skills as a photographer than by shooting film. You have to know your settings and if you mess up your photos, there is no way to save it with post-processing.
On top of that, it’s not very expensive to get into and the colors you can get with certain film stocks are beautiful and hard to replicate with digital cameras.
If you’re looking for a good film camera to start off with, my two favorites 35mm film cameras are the Pentax K1000 and the Canon AE-1.
34. Landscape Photography Doesn’t Just Mean Shooting Nature
You might disagree, but to me, landscape photography is more than just shooting in nature. Go out and shoot cityscapes, and streetscapes too as you will improve your landscape photography skills by shooting in these environments.
35. Don’t Box Yourself in as a Landscape Photographer
Along the same lines, don’t box yourself in and think that because you’re a landscape photographer, you don’t do other types of photography.
Go out and shoot portraits, still life, pets, street photography, and anything that you can shoot. It will all improve your skill as a landscape photographer.
36. Backup your Footage as Soon as you Can
This is definitely one of the boring administrative items of landscape photography, but I can’t tell you how important it is to backup your footage as soon as you can. There is nothing worse than losing the photos that you have worked so hard to capture.
Pro Tip: Some cameras have 2 memory card slots. If this is the case, use one memory card to shoot raw and the other to shoot JPEG. This will save on memory space and you will at least have a backup JPEG photo if something happens to your main memory card.
If you’re looking for a suggestion on what memory card to pick up my favorite is Sandisk when I have the budget. For when I have a tighter budget I like to go with PNY as they are pretty comparable to Sandisk.
37. Don’t Forget to Look Back
When you’re out in the field, don’t forget to look backward as you go to your shooting location. Sometimes the best composition or light is behind you and this is especially true if you’re hiking to a location.
38. Make a Shot List when Possible
You won’t always be able to do this, but if you have time, make a shot list of all the different shots you want to try at a given location.
With Instagram now, it’s incredibly easy to search a location by hashtag and find inspiration for the different angles and perspectives you want to capture a location from.
39. Use Aperture Priority
There are so many variables you have to consider when you’re out shooting that it’s better to simplify with aperture priority and focus on your composition. Modern-day digital cameras are so advanced now that they are extremely accurate in getting the exposure right.
40. Don’t Forget About Timelapse
Shooting timelapse from the location you’re taking landscape photos in is a great way to capture memories from that day.
In addition, you might be able to capture subtle changes in the environment that you might have missed while shooting. I like to use a smaller secondary camera like any one of these budget filmmaking cameras.
The best part if you go this route is that if you ever get into video, you have a camera just as capable for filmmaking.
41. Create Sun Stars when Possible
It’s not possible in every landscape situation, but when possible, capturing sun stars can add a great magical element to your landscape photographs.
To shoot sun stars you will have to:
- Use the right aperture. Usually, you will be able to create sun stars by using a small aperture between f/16 to f/22 but this will depend on your lens.
- Capture the sun as it peeks around a solid element like the horizon, tree, mountain, etc.
- Have the right conditions. If the atmosphere is too cloudy, hazy or foggy, you will probably not be able to capture a sun star.
42. Bracket Your Exposure (when needed and possible)
There will be many times you will find yourself in a very dynamic lighting situation where it will be difficult to properly expose the entire image such as exposing the dark mountains against the bright sky.
If you don’t have a graduated ND filter, you can bracket your exposure instead.
To do this:
- Set your camera on a tripod
- Take one shot to expose for the dark elements
- Take one shot to expose for the bright elements
- Stitch the photo together in post-processing
43. Shoot Panoramas when the Time is Right
Panoramas don’t work in every situation, but when the time is right they can create an awesome and epic photo that shows the scale of the landscape.
Some cameras have the ability to capture panoramas in the camera, but I think the best way to capture panoramas is by taking photos of each section of the panorama separately and then stitching them together in post-processing.
By doing it this way, you will also capture the most detail in the image.
44. Shoot the Same Location During Different Seasons
This isn’t always possible, but if it is, go out and shoot the same landscape location during different seasons. Each season will give you a different feel and you never know what may happen the next time you’re out at the same location.
45. Double the Distance Focusing Method
If you are creating depth by using a smaller aperture from f/9 to f/16 to keep everything in the image sharp, a good reference point on where to focus in the image is the “double the distance focusing method”
To use this principle, focus twice as far as the closest subject in your image. Of course, this will depend on the lens and camera you have, so first make sure you understand your camera.
46. Sometimes Simpler is Better
When you’re out shooting an epic landscape, sometimes it’s easy to overthink and over complicate the image. In most cases, simplifying your image can make it more powerful and more pleasing to the viewer’s eyes.
47. Make Small Adjustments to your Composition
Don’t just set up and shoot your entire landscape session without moving your camera. Even if you think you have the perfect composition, make small adjustments of a few inches to see how it looks.
Sometimes a small shift left, right, up, or down in your composition can make a HUGE difference.
48. Stick with your Camera and Learn Everything About It
Gear acquisition syndrome (GAS) is hard to ignore, but try your best not to give in! One of the best ways to create better images and to become a better photographer is to stick with one camera and learn everything about it.
You should become so familiar with your camera that changing settings is second nature when you’re out in the field.
If you just can’t handle it any longer and have to buy more camera gear, stick with buying a new lens instead of a new camera body. All modern-day digital camera bodies are capable of taking incredible pictures.
49. Use your Phone to Preview the Image
A quick and easy way to check your composition is to use your phone camera to preview the image. Depending on which phone you have, it should give you a good sense of what a shot with about a 20mm lens would look like.
50. Get Creative with Camera Panning Movements
It’s fun to get creative once in a while. A great way to capture energy and movement in your image is by panning your camera while shooting at slower shutter speeds.
By doing this, you can create a more abstract art kind of look. You can also freeze the subject while showing movement if you have a moving subject like a surfer or a car in a city landscape shot.
51. It 100% Doesn’t Matter How Expensive your Camera Gear is
It’s worth repeating that all modern-day cameras, even the camera on your phone, are capable of creating incredible images. Yes, newer cameras might give you features that can help you create amazing images, but how good the photo is will come down to your skill as a photographer.
Awesome tips! I am going to have to really go thru these several times! Thank you Tom!
Hi Ross, thanks for your kind message and I’m really glad you found the tips useful!
Thank you!!!
Very helpful, informative article! Problem keeps together all important things, back home and OH i forget to change ….I will saved this article and read again, for next shots.
Hi Lyudmila, thanks for reading the article and I’m glad you found this information helpful! If any questions come up in the future let me know too!
Simply awesome, I am surely impressed
Thanks Sohail! I’m glad you enjoyed the article and thanks for reading.
For point 51.. I was like.. Yeah, but having only 3 AF points on my Olympus e-520 and a max ISO of 1600 was slightly maddening. I have since gotten a mirrorless camera. Haha.
Hahaha yeah I guess it doesn’t matter to a point. I’m glad to hear you’ve gotten a mirrorless camera since then. I’m sure you learned a lot from having so many limitations with your Olympus though 🙂
Beautiful photographs and great hints/suggestions, especially knowing everything about your camera . Thanks so much!
Hi Kent! You’re welcome and I’m glad you enjoyed the article!
Thank you for this article, really informative and interesting. I’m doing a course at the moment, we have covered many of your points already and it’s good to see them explained slightly differently. I shall be following you on Instagram from now and trying to work out which ideas you are using, and using them myself. Thank you x
Hi Tania!
Thanks for your kind words and for following on Instagram! I’m glad you found the article interesting and please let me know if any questions ever come up
Best,
Tom
Great Tips, thank you
Hi David! You’re welcome and I’m glad you found the tips helpful!
Thank you for the tips! A great way to start getting ready for summer trips in Idaho!
You’re welcome! Have fun in Idaho!