
There is something about natural light that just cannot be reproduced in the studio. Whether it is daylight, moonlight, or even starlight, photos taken outdoors have that special something that makes them stand out.
There’s also the presence of space. Be it a busy street full of life or the vast open ocean, that feeling of being there is pure gold.
In the beginning, I used to think that outdoor photography was all about the golden hour. Now that I have spent a few years as a professional photographer, I can confidently tell you that there is no actual right time for getting a great shot outdoors! It all depends on what you are going for.
So this article is a guide to shooting during some of the key moments of the day. I will also be covering tips for days when it is overcast or the weather is bad. Here are the 5 main times of the day that I will be going over:
- Golden Hour
- Twilight and Blue Hour
- High Noon
- Night
- Overcast and bad weather
So now let’s jump right in.
Golden Hour

Golden hour is a window of time that stretches over about 40 minutes to an hour right before sunset or after sunrise. The light that you get during this time is distinct, with beautiful red and gold tones.
And the higher up the latitudes you go, this window of time will start to stretch out. For example, in some parts of Norway, the sun barely sets during the summer months (which also means there is perpetual darkness during winters!).
During these times of the day when the sun is low on the horizon, the shadows are softer and the color tone of the light makes everything look warmer and more attractive. It is especially good for portraits because it flatters most skin tones.
It is not just about portraits though. Take the picture below for example.

That golden light on the snow-covered mountains creates the ultimate backdrop for Melissa to run towards. The soft light makes the dynamic range (brightest to darkest parts) of the image easier to balance. No other time of day has this much scope for a beautiful display of natural colors.
Tips for Golden Hour Photography
- Choose your spot in advance because the light doesn’t last long
- Plan ahead and arrive a little early
- Set your white balance properly
- Shoot at angles to the sunlight to create side glow or flares
- Use an app like Photopills to get your timing right
- Use a wide aperture to get enough light and use selective focus
- Use the spot metering mode to make sure you are exposing correctly
- Keep a reflector and an assistant on hand to fill in shadows if required
- Use a flash as a fill light but make sure to balance the color tone
- Shoot into the sun and create silhouettes against it
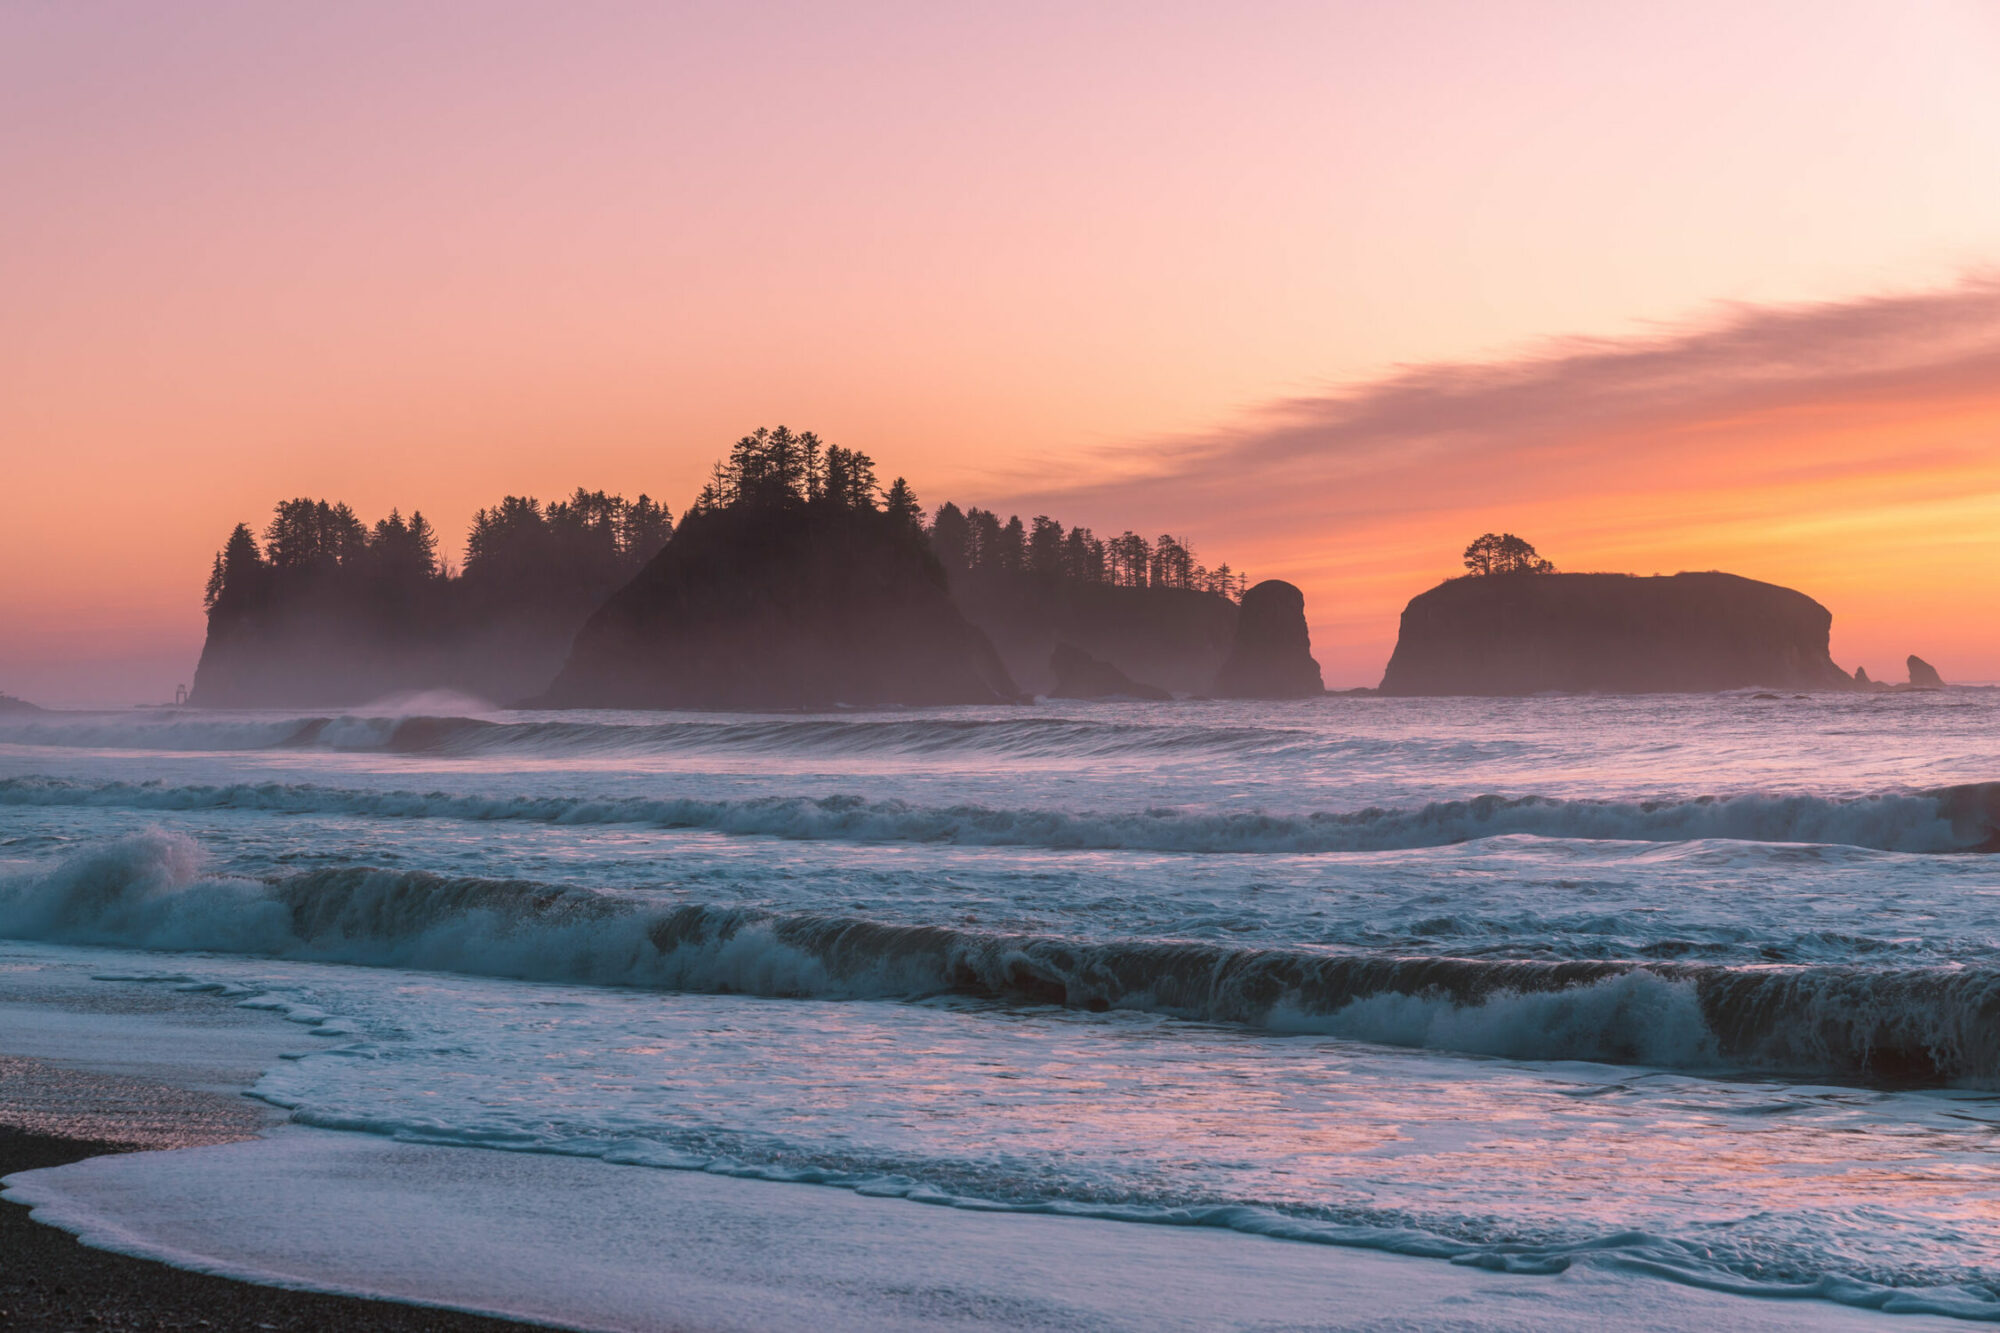
Blue Hour (Twilight)

Golden hour is possibly one of the first things that photographers come across when they learn about shooting outdoors. But it takes most of them a surprisingly long time before they hear about the Blue Hour.
As the name suggests, the light during this time of the day is predominantly filled with blue tones. It occurs about 40-50 minutes before sunrise and after sunset, when the sun gives off a diffused ambient glow from beyond the horizon.
Think of it as being just a sliver before dawn and a little late into dusk before the light fades to darkness.
This time is what is known as Twilight.
My favorite Blue Hour time is the one just before sunrise. Populated places are empty during this time and yet lights are still on, creating a surreal feel to the images.
Winter landscapes are especially beautiful shoot in this light because of the play of the blues on the white snow. Waterbodies also make for amazing subjects for Blue Hour photography.

On the borders of the blue hour and the sunset or sunrise, you will get beautiful reds and pinks in the sky that are set off against the blue. You will notice that the tones vary between the sunset and the sunrise so you should explore both scenes as much as you can.
Tips for Blue Hour Photography
- Get enough sleep the day before because you will be getting up in the wee hours
- Pack your bags before you sleep
- Choose fast lenses and pack a tripod
- Use a remote shutter release to minimize shake
- Pack a headlamp or a flashlight to help show the way
- Choose your location in advance
- Use an app like the Photographer’s Ephemeris or PhotoPills to get your timings and directions right
- Use a compass if you are not sure about which way east is
- Shoot in RAW because you will need to balance out the light
- Try out long exposures with moving clouds or water
- Use reflections on water
- Experiment with fill light using strobes or continuous lighting
- Use hyperfocal distances to get sharp images while shooting wide open
Night

Night photography can yield some of the coolest and unusual images when done right. Night in a city is filled with myriad light sources of varying intensities and hues that create opportunities for captivating frames and compositions.
Nights in the great outdoors are filled with opportunities to shoot star trails, moonlit landscapes, and much more.
Shooting at night is however a little tricky and requires some studying and practice. You will really have to get used to the manual mode to get this right.
The extremely low light conditions at night make it necessary to push the ISO or really slow down the shutter or both. You will need to know your camera and lenses in-depth to know how far you can push them before you start to lose quality without gaining anything.
Done correctly, you can get fairy tale images that are impossible to get in daylight, like the one you see above.
The image works so well because of the plethora of lights shot against the darkness of the night sky. It is also important to master your post-processing abilities in Lightroom and/or Photoshop to get the most of out of shots like this.
Tips for Night Photography
- Use fast lenses and shoot wide open
- Use a tripod
- Carry flashlights or headlamps to find your way in the dark
- Regularly explore places by night to find interesting spots
- Get your white balance right
- Use long exposure techniques to create light trails or capture dark areas
- Experiment with techniques such as light painting
- Experiment with an off camera strobe to highlight certain parts of a frame
- Find out where the stars are clearly visible
- Use an app like Star Walk II to find out when and where the Galactic core or just the Milky way will be visible
- Use something like the Dark Sky app to find areas with low or no light pollution to try out astrophotography
- Paint a subject in a totally dark area using a red light during a long exposure
- Dress appropriately to keep warm, out of the wind and protected from insects
- Try out timelapses
- Keep extra batteries on hand
High Noon

From the deep darkness of the night, we come into the blinding brightness of the mid-day sun. Apart from all the squinting, the deep shadows and the harsh colorless light make it difficult to get a good shot during this time.
Or so you might think.
In reality, you can get fantastic high contrast images during high noon precisely because of the deep shadows.
The bright overhead light is also great for shooting deep inside places like canyons and using the reflected light to bring out all the vibrant colors in them.
In the image above, the light reflected from all the sand is adding soft shadows to the composition while the dark shadows cast by the trees are providing a good counterpoint to the rest of the elements.
High noon is also a good time to find places with interesting patterns of light and shadow, created by sunlight passing through various gaps in stairs, fences, etc.
With some practice and a little planning, you can make the most of the brightest time of the day and get great shots.
Tips for Shooting At High Noon
- Use reflected light from surfaces like concrete sidewalks, light-colored walls, tables, etc. to fill out shadows
- Avoid dark asphalt roads that absorb light unless you want a stark look
- Use an assistant with a portable diffuser to diffuse direct light when shooting portraits
- Look for shadowy nooks and corners with shafts of sunlight
- Use a fill light to soften harsh shadows
- Get indoors where there’s a lot of natural light bouncing off the walls and ceilings
- Use the harsh shadows to create a high contrast look
- Create silhouettes by shooting in the shade against a bright daytime backdrop
- Experiment with a 10-stop ND filter for slow shutter shots
- Use a polarising filter to cut down on unwanted reflections
Overcast and Bad Weather

A completely overcast day is a photographer’s delight because it is like having a universal diffuser clamped onto the sun.
You can shoot throughout the day without noticing much change in the light. All the shadows are softened and dense areas like forests are evenly lit, creating the ideal situation for getting all the details.
In the image above, the diffused light from an overcast day created a mysterious and wistful look. By adding light around Melissa and darkening the rest of the frame, I was able to make her red-clad figure stand out even more.
During bad weather, the changing skies create perfect opportunities to get dramatic moments.
Sunlight can peek through in bursts and create shafts of light falling on a small area, creating a fantasy landscape. Braving the elements with your camera during these days is certainly worth it because you might chance upon the shot of a lifetime.

In this example, I used the passing clouds on a rainy day to my advantage.
I was up high where you could see the clouds caressing the mountaintops. I had all the time in the world to take this shot because the light was already diffused and holding steady with lots of clouds moving about.
Tips for Shooting Overcast and Bad Weather Days
- Weatherproof and seal everything
- Carry extra plastic bags and some towels
- Dress appropriately and take precautions to keep warm and dry
- Avoid unnecessary risks when the weather is extreme
- Watch the forecast and observe the patterns locally
- Keep your camera ready at all times
- Pack a variety of lenses, extra batteries, and a tripod
- Take multiple lens cloths
- Try long exposures with moving elements
- Use elements like strong gusts of wind to your advantage (blowing hair, leaves, billowing clothes etc.)
- Wait for dramatic moments to unfold themselves, stay sharp, be patient
Summary

When it comes to shooting outdoors, there really is no perfect time.
Right now is always a good time to take your camera out and try out some of these tips.
Remember to always experiment whenever you are shooting, unless of course, you are with a client. In that case, stick to what you know will work and leave the experimentations for when you are shooting on your own time and for the fun of it.
Photography is all about using the light, which is always changing no matter the weather or location.
Remaining aware of these changes wherever you go will always give you an extra edge as a photographer. Using tools such as weather apps, reflectors, portable strobes, and filters will help you take your shots from just good to great.
The most important tip to remember is to study and memorize your camera and lens settings.
This should be followed up with thorough research into all the ways you can use your accessories such as the ones mentioned above. Always max out all the possibilities of your existing gear before you consider adding anything new to the mix.
Here are links to the useful apps that I mentioned in this article plus a few others:
1. The Photographer’s Ephemeris – For overall planning
- iOS Only: https://itunes.apple.com/us/app/the-photographers-ephemeris/id366195670?mt=8&ign-mpt=uo%3D4
2. Star Walk II – For tracking the constellations and the Milkyway
- iOS: https://itunes.apple.com/app/star-walk-2-guide-to-sky-day/id892279069
- Android: https://play.google.com/store/apps/details?id=com.vitotechnology.StarWalk2Free
4. NOAA Hi Def Radar – For satellite weather imagery
- iOS: https://itunes.apple.com/app/noaa-hi-def-radar/id458225159?mt=8&ign-mpt=uo%3D4
- Android: https://play.google.com/store/apps/details?id=com.weathersphere.noaa_hidef_radar&hl=en
5. My Aurora Forecast – For those chasing the northern lights (Auroro Borealis)
- iOS: https://itunes.apple.com/us/app/my-aurora-forecast-northern-lights-borealis/id1073082439?mt=8
- Android: https://play.google.com/store/apps/details?id=com.jrustonapps.myauroraforecastpro&hl=en
6. PhotoPills – All in one app for planning your shoots
- iOS: https://itunes.apple.com/us/app/photopills/id596026805?mt=8
- Android: https://play.google.com/store/apps/details?id=com.photopills.android.photopills&hl=en
7. Dark Sky Finder – Tracking areas with low light pollution for astro photoghraphy
I hope this article has given you some inspiration to get out there and try things out. Which ones called out to you and which one surprised you the most?
Tell me in the comments below.