
So, is the DJI Pocket 2 worth it?
Yes, in short, the DJI Pocket 2 is worth it. It has incredible video features, it’s tiny in size, and it’s gimbal stabilized. However, what “worth it” means to you will depend on what you’re looking to do with the camera.
In this article, I’m going to break down who I think this camera is for, how it performs as a cinematic camera, and some tips and tricks to get the most out of the camera.
Note: As a quick note, the DJI Pocket 2 is not waterproof and is not rugged. If you’re looking for these features in a pocket-sized camera, I would recommend you to take a look at the GoPro Hero 9.
Why the DJI Pocket 2 is a Great Camera for the Filmmaker/Vlogger or Casual User?
I think the DJI Pocket 2 is one of the best camera options for the content creator at any level.
Yes, there are some pros and cons depending on what you’re trying to do and what platform you’re planning on publishing on.
However, there really is something for everyone.
Here is why I think the camera is great for both the professional/semi-professional Filmmaker and Vlogger or even the casual user.
DJI Pocket 2 as a Filmmaking and Vlogging Camera
Overall, the DJI Pocket 2 can fit in many filmmakers’ and vloggers’ workflow. The reason why I say this is because of its large selection of 4K video frame rates plus it’s gimbal-stabilized
Add in the other “advanced” filmmaking features such as the D-Cinelike picture profile and full manual mode and you have an all-in-one package capable of producing very cinematic footage.
One of the best ways to use the DJI Pocket 2 as a filmmaker is as a B camera. Since it’s so small, it’s easy to carry around in case you need to quickly capture extra footage or need an easy way to shoot timelapse, motion timelapse, or hyperlapse.
Why the DJI Pocket 2 is Worth It for Filmmakers / Vloggers?
- Good selection of frame rates including 4k up to 60 FPS and slow-motion mode in 1080p up to 240 FPS.
- Small and easy to carry around as a B camera.
- Gimbal stabilized so you can get buttery smooth footage.
- Built-in timelapse and hyperlapse mode including panning timelapse mode.
- D-Cinelike picture profile will give you more flexibility when color correcting and color grading.
- Full manual mode so you can control shutter speed, ISO, white balance, etc.
Limitations for Filmmakers / Vloggers
- Can’t interchange lenses.
- Small sensor size so low light performance isn’t the best (more on this below).
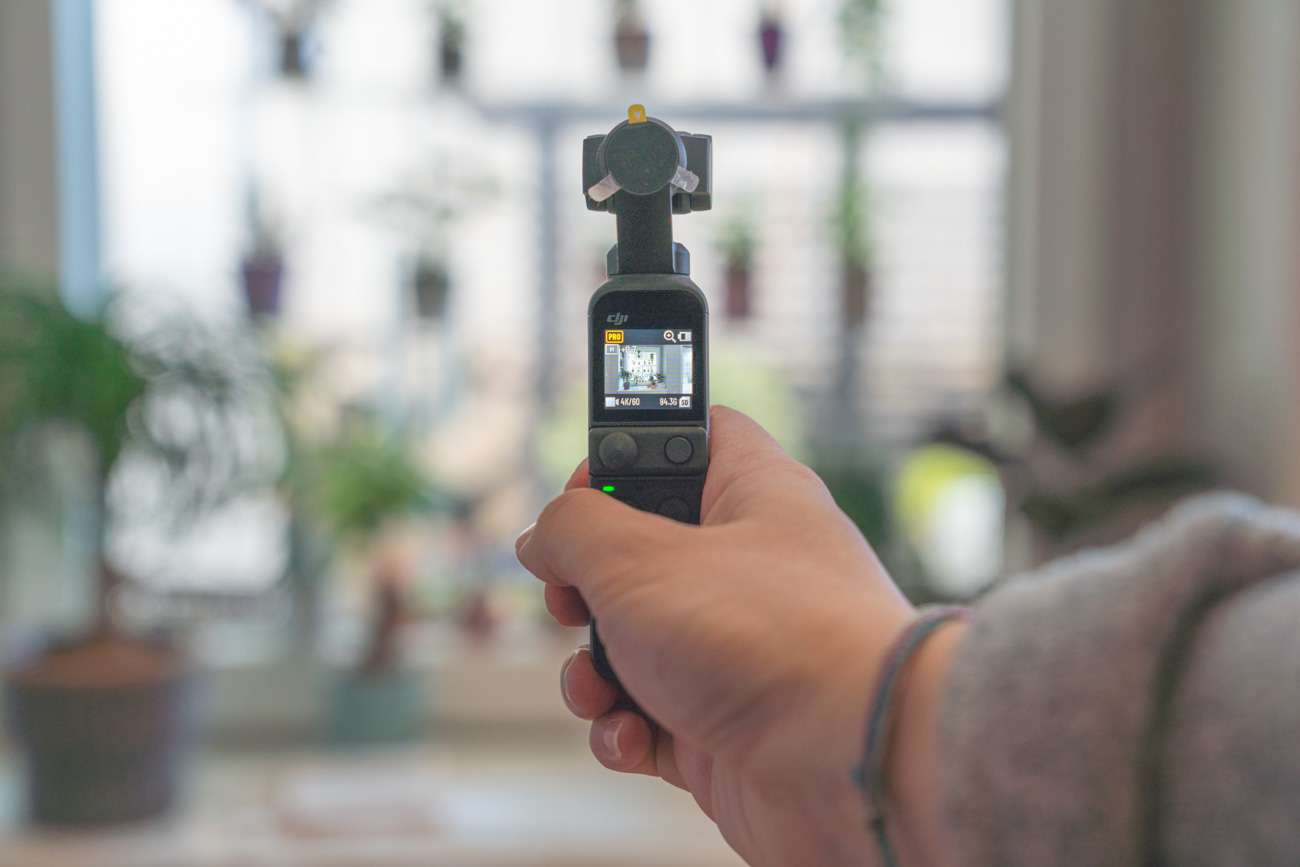
- Small screen if you don’t connect it to your smartphone, which might make it difficult to see what you’re filming.
- The battery is built-in so you can’t use spare batteries. Note: you can charge it and use it at the same time via USB C though.
- You’ll need to buy the separate Do It All Handle to get a mic jack.
DJI Pocket 2 for the Casual User
The DJI Pocket 2 could be a great camera for casual users who are looking for something to use around their home or on vacation.
The biggest limitation is that it’s very similar and at times worse off than new smartphones like the iPhone 12. With that said, for any casual user who is looking for an easy way to capture beautiful, cinematic footage of everyday life, the DJI Pocket 2 could be the camera.
Why It’s Worth It for the Casual User?
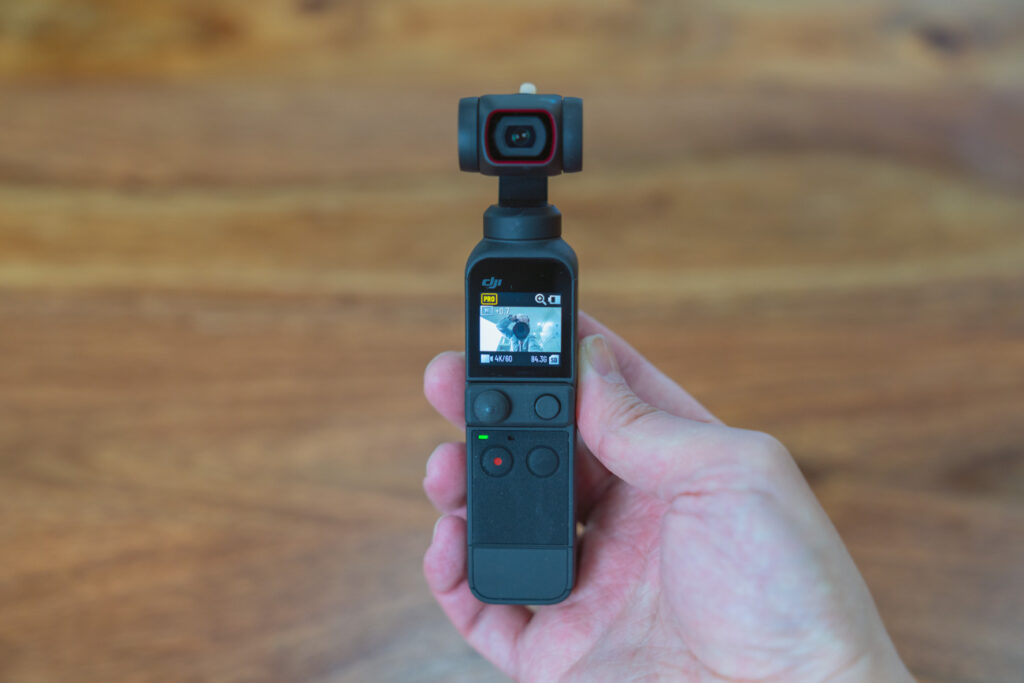
- Small and very easy to carry around. It also starts up fast so you can start shooting right away.
- Gimbal stabilized so you get very smooth footage.
- Intuitive menu system so you can switch between the different modes very quickly.
- The Active Track feature allows you to easily follow a subject.
- Can capture high-quality images in both JPEG format (16 megapixels) or RAW format (64 megapixels) which gives you the flexibility to shoot video or photos.
- Automatically switches to vertical mode if you turn the camera on its side for when you want to shoot a video for social media.
Limitations for the Casual User
- It’s not rugged or waterproof so it’s not the best choice for beach vacations or extreme sports.
- The screen is small which makes it difficult to see what you’re shooting.
- A smartphone might be a better option especially if you have a newer smartphone like the iPhone 12.
- A smartphone might be a better option especially if you have a newer smartphone like the iPhone 12. Note: you can charge it and use it at the same time via USB C though.
Cinematic Performance of the DJI Pocket 2
Example 1: Chef’s Table Inspired Cinematic 4k Video
Overall, the DJI Pocket 2 performs and handles very well as a cinematic camera. I have to say what surprised me the most is how good the 4k footage looks even in low light conditions considering it has a 1/1.7″ sensor.
To get a better idea of what the camera is capable of, I shot this 4K cinematic video while preparing our Lunar New Years Dinner.
95% of the video was shot in semi-low light conditions in the kitchen at night, so I think it does a good job of showcasing how the camera performs.
All the 4K footage in the video was either shot in 4K 24FPS or 4K 60FPS. The timelapse clips in the video were created using the Motionlapse mode in the camera using the Video Only setting.
Camera Settings Used:
- Video Format: 4K 23.98 FPS or 4K 60 FPS
- Shutter Speed: 1/50 when shooting in 4K 24FPS and 1/120 when shooting in 4K 60FPS
- ISO: 800
- White Balance: Auto
- Picture Profile: D-Cinelike
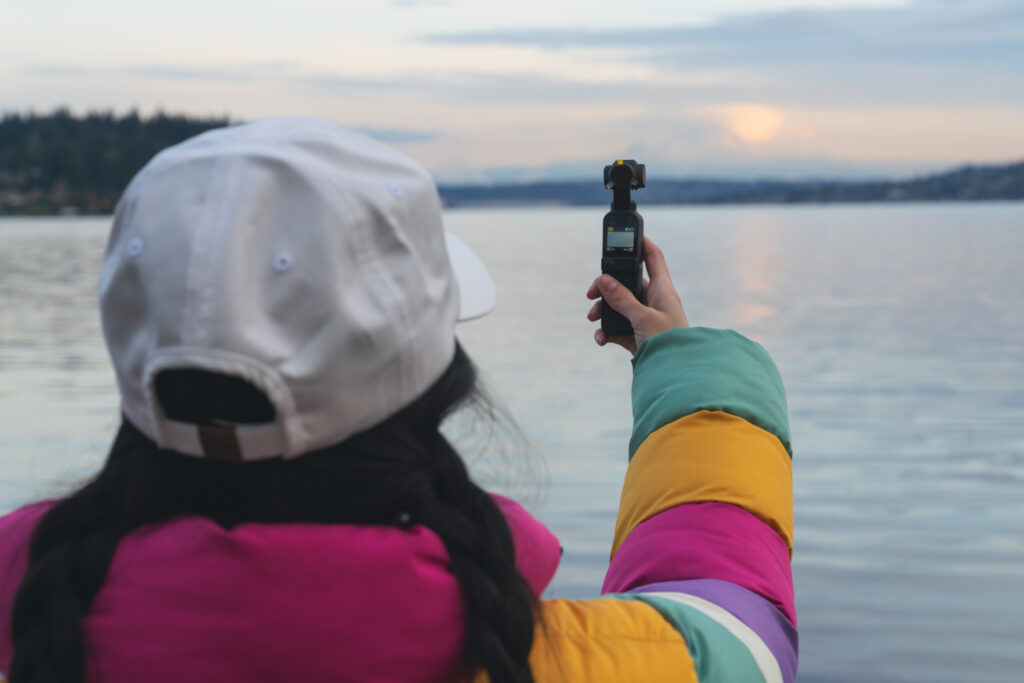
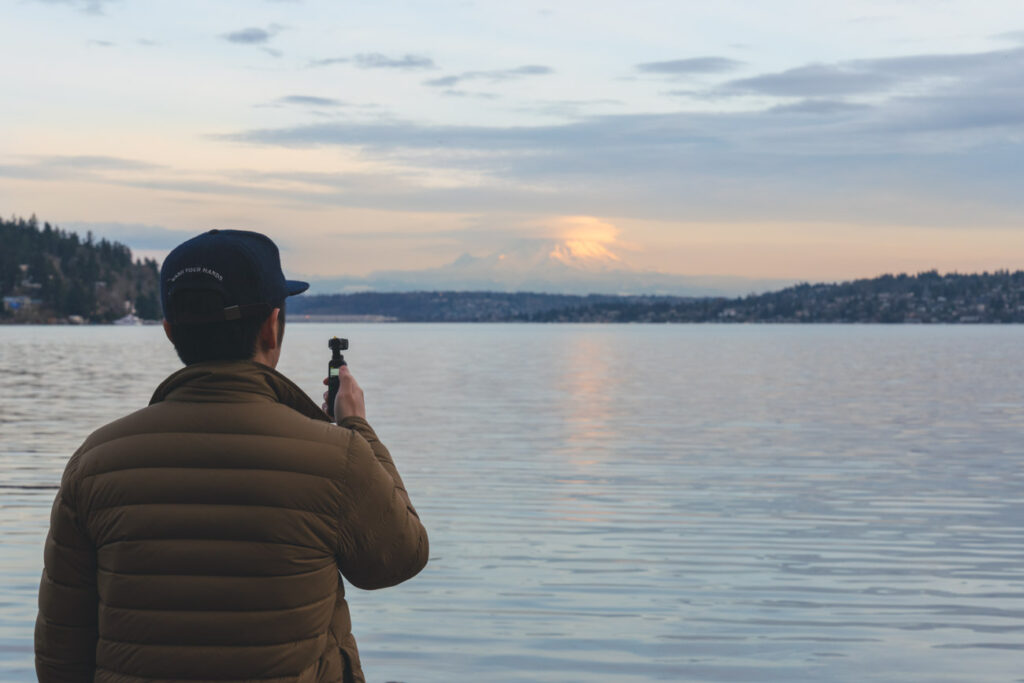
Example 2: Cinematic Test Reel Shot in Washington State and Oregon Coast
This cinematic test video was shot on my trip through Washington State and the Oregon Coast. All the clips in this video were shot in 4k 23.98 FPS using the DJI Pocket 2 D-Cinelike picture profile.
To show you what the DJI Pocket 2 is capable of, I shot footage in a variety of different environments and lighting conditions. Some of the environments include sunrise and sunset on the Oregon Coast, mid-day in a field of daffodils in Skagit Valley, and indoors in a greenhouse.
In addition, I’ve included example comparisons throughout the video of ungraded and graded footage using the D-Cinelike picture profile. These comparisons are found at the following timestamps in the video:
- Cannon Beach Sunset: 0:23
- Cannon Beach Sunrise: 1:10
- Oregon Coast Sunset: 3:39
- University of Washington Cherry Blossoms: 4:11
Camera Settings Used:
- Video Format: 4k 23.98 FPS
- Shutter Speed: 1/50
- ISO: As low as possible, but tried not to go over ISO 400
- White Balance: Auto
- Picture Profile: D-Cinelike
- ND Filters: Freewell Bright Day ND Filter
What Stood Out
Timelapse / Motionlapse is Super Easy to Use
It’s pretty incredible how quickly I was able to create motionlapses or panning timelapses in camera. This stands out as you would typically need a camera capable of shooting timelapses and some sort of slider for the panning motion.
D-Cinelike Picture Profile Is Surprisingly Flexible
I was very surprised by the dynamic range of the D-Cinelike picture profile given the camera has a small 1/1.7” sensor. Since I was shooting in my kitchen, many of the clips were underexposed. However, I was easily able to increase the exposure in the clips by >1 stop and layer on a LUT without impacting the image quality.
4K Footage in All Frame Rates Are Very Good
I plan to test the camera in other environments too and will update this section again after I do so. However, from what I’ve seen so far, the 4K video quality is very good. Again, this is a real-life example and not a technical one, but I would be ok using this footage for a client project.
Just take a look for yourself in my cinematic video and let me know what you think!
Easy to Capture Very Unique Footage
Because of how small the camera and its gimbal stabilization, it makes it very easy to manipulate the camera into a variety of different positions. This allows you to capture angles and footage that are difficult to execute with a traditional camera setup.
Its Clear Downsides as a Filmmaking Camera
Depth of Field
Even with an aperture of f/1.8, the depth of field you can achieve is only average. This is understandable since the sensor is so small and it’s a pocket camera. However, if you’re looking to create a very shallow cinematic depth of field, this camera might not be for you.
Can’t Change the Aperture
You can’t change the aperture so you’ll always be shooting at f/1.8. This isn’t that big of a deal in some situations, however, when you’re shooting video outside you’ll need ND filters to stay within the 180-degree rule.
For photos, you can just crank up the shutter speed to compensate if it’s too bright outside.
Top 10 DJI Pocket 2 Tips and Tricks
1. Try Using the Motion Timelapse Feature
This is one of my favorite features of the camera as you normally would need a complicated setup to achieve a panning timelapse. The Motion Timelapse mode is kind of hidden, so here’s where you find it.
To enable Motion Timelapse swipe left on the screen, scroll down to Timelapse, and swipe left again. Now, select Motion Timelapse.
2. Understand the Different Timelapse Formats You Can Shoot In
There are now 3 different video/image formats you can shoot in when using the Timelapse and Motion Timelapse modes in the camera. It’s good to understand these different video/image formats so you can choose the one that works best for the situation you’re shooting.
The Timelapse formats are kind of hidden so here is how to change them.
Note: the option to change the Timelapse recording format is only available in Pro Mode, so first make sure you have Pro Mode enabled.
- Select either Timelapse or Motion Timelapse mode and go back to the main screen.
- Tap Pro in the top left corner to bring up the settings. On the first setting page in the bottom left-hand corner, you’ll see the different timelapse formats you can choose from.
Here are each of the formats and what type of situation they’re good for:
- Video Only: In Video Only Format, the DJI Pocket 2 will shoot the timelapse or motion time-lapse and export it as a finished video. This is a good option to choose if you want to quickly capture and share a timelapse without having to use video editing and photo editing software.
- Video + JPG: In this format, the camera will create a finished timelapse or motion time-lapse video and will capture the timelapse in a series of JPGs. This is a good option to choose if you want to create a high-resolution timelapse using video editing software, but don’t need RAW images.
- Video + RAW: In this format, the camera will create a finished timelapse or motion timelapse video and will capture the timelapse in a series of RAW image files. This is the best option to choose if you want the most flexibility to create a high-resolution timelapse. RAW image files contain more information than JPG, so you’ll be able to color correct and color grade it much easier. To create a timelapse from RAW image files, you’ll need both photo editing and video editing software.
3. Use Pro Mode Even If You’re Not a “Pro”
Enabling Pro Mode gives you much quicker access to important settings such as exposure, white balance, and autofocus. So, even if you don’t plan to shoot in full manual mode, it’s good to enable Pro Mode to get access to these other settings.
To enable Pro Mode, swipe down on the menu. Then swipe to the right side of the menu. Select the Pro button to enable Pro Mode.
4. Understand the 4 Different Gimbal Modes
Having a good understanding of the 4 different gimbal modes will allow you to pick the right one for the situation you’re in or the type of shot you’re trying to execute.
The easiest way to switch between the different gimbal modes is to use the right button on the DJI Mini Control Stick which is included with the DJI Pocket 2.
Here are the 4 different shooting modes and what they work best for:
Tilt Lock
In Tilt Lock mode only the Pan axis (X-axis) is free to follow while the Y-axis is locked and the roll axis remains level.
For example, in this mode, if you tilt the camera left or right or from up to down, the camera will still face frontward. This is a good mode to use for shooting forward or backward movement or if you want to shoot in “Flashlight mode”.
FPV
In FPV mode, all the axes (pan, tilt, roll) are free to move and will follow the motion of the camera. So for example, when you move the camera left to right, the camera will pan and roll from left to right with the motion of the camera.
This mode is good to use for action shots when the camera position is continuously moving and there’s less stability.
Follow
This mode is perfect for most situations and works great in combination with the ActiveTrack feature. In this mode, the pan and tilt axes are free to follow and the roll axis remains level.
Complete Camera Lock
You can completely lock the camera by pressing and holding the right button on the DJI Pocket 2 Mini Control Stick.
When you completely lock the camera, it will not follow the movement of the handle and will remain locked on where the camera was pointing when you enabled Complete Camera Lock.
I like to use this mode if I’m panning straight in on a subject and want to keep the camera fixed in the same position.
Note: to release the complete camera lock mode just press the right button on the Mini Control Stick again.
5. To Get the Best Quality, Don’t Use Battery Saver Mode
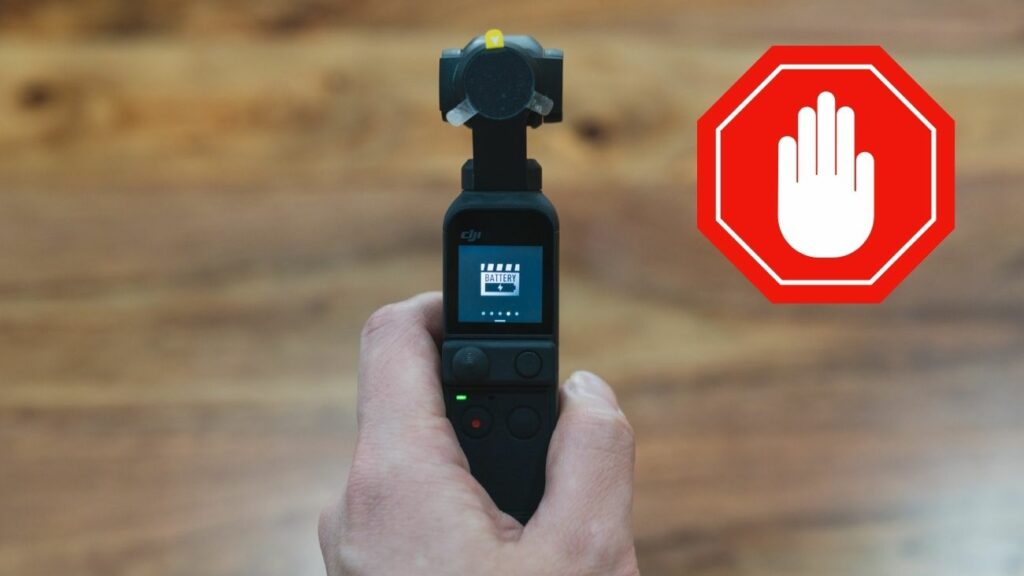
When you shoot in battery saver mode, the camera shoots in at a lower bit rate than when you shoot in High-Quality Mode.
After testing, I found the bit rate In High-Quality Mode was ~100 Mbps versus a bit rate of 80 Mbps in Battery Saver Mode.
This isn’t a big deal if you’re just shooting casual content. However, if you’re creating a video for professional work or want to color correct and color grade your footage in post, it’s better to use High-Quality Mode.
This isn’t a big deal if you’re just shooting casual content. However, if you’re creating video for professional work or want to color correct and color grade your footage in post, it’s better to use High-Quality Mode.
6. Choose the Right Follow Speed for What You’re Filming
There are two different follow speeds in the camera; Fast Follow and Slow Follow. Fast Follow is the better choice if your subject is moving fast and Slow Follow is the better choice if you want more cinematic movements.
To change the follow speed of the camera, swipe up on the screen to access the menu. The follow speed setting is the bottom left icon.
7. To Get the Best Quality Photos, Shoot in 64 Megapixel Resolution
There are actually two different photo resolutions you can choose between to shoot in either JPEG or RAW format. The two resolutions are a High-Pixel 16 megapixel resolution and a Ultra High-Pixel 64 megapixel resolution.
If you want the best quality images with the most detail, make sure to use the Ultra High-Pixel 64 megapixel setting. Additionally, if you plan to edit your photos in photo editing software like Lightroom or Photoshop, shooting in RAW format will give you more control over the image file when editing.
To change between photo resolution, first make sure you’re in photo mode. Then swipe down on the screen. The photo resolution option is the 4th from the left.
To change between JPEG and RAW format, again, make sure you’re in photo mode. Then tap the Pro button in the top left corner to bring up the settings. On the first setting page in the bottom left-hand corner, you’ll see the picture format selection setting.
8. You Can Charge and Use the Camera at the Same Time
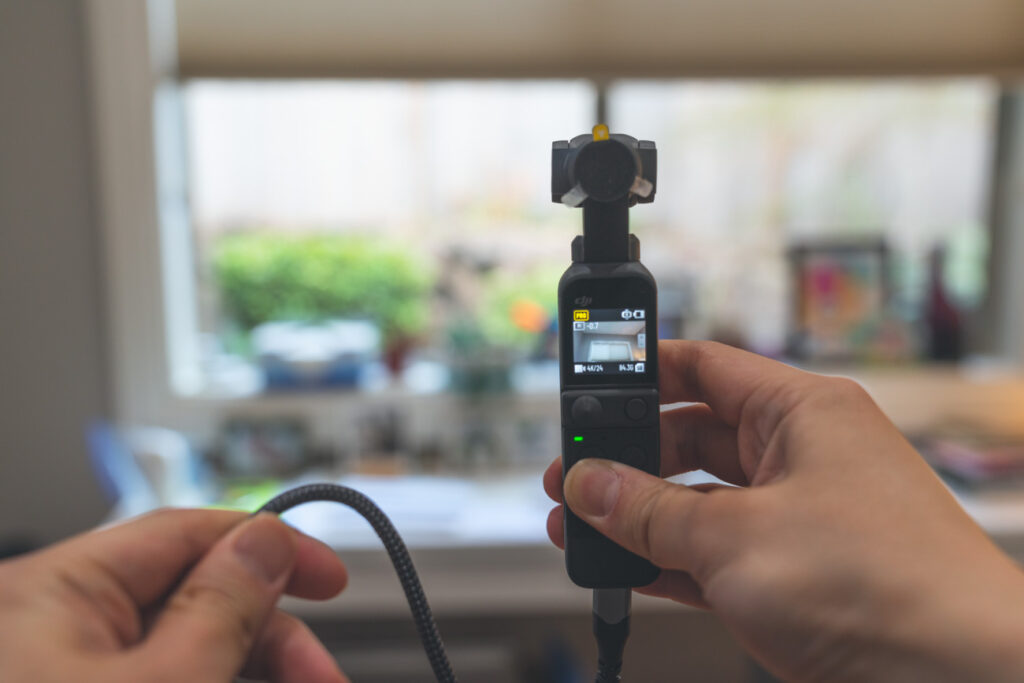
The nice thing with the DJI Pocket 2 is that you can charge it through a USB C cable and use the camera at the same time.
Since the battery life isn’t the best and it doesn’t have interchangeable batteries, this allows you to use an external battery pack to increase battery life while shooting.
9. Turn the Camera on its Side for Vertical Mode
If you want to shoot video in portrait orientation for social media, all you have to do to shoot vertical videos is turn the camera on its side!
10. Use D-Cinelike Color Profile for Increased Dynamic Range
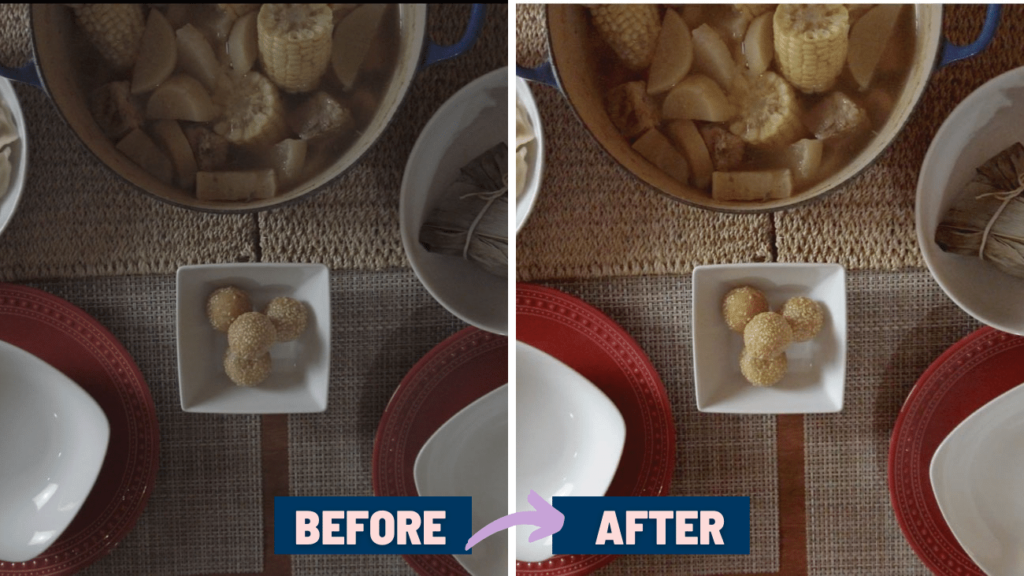
If you plan to color correct and color grade your footage, make sure to use the D-Cinelike color profile. D-Cinelike is a flatter picture profile, which will give you more dynamic range and flexibility to edit the footage in post.
Here’s a frame from my cinematic short film to show you what the footage D-Cinelike footage looked like before and after color correcting and color grading.
To change your color profile, first make sure you have Pro Mode enabled. Then in Video Mode, tap the Pro button in the top left corner to bring up the settings. In the bottom left hand corner you will see the color profile settings. Tap this setting to change it between D-Cinelike and Normal.
Thanks for the great review and information ! Im considering purchasing this Pocket 2 and really need to learn as much as I can before I do. This article has been a huge help!
Hi Lance! Thanks for reading the article and I’m glad you found the article helpful! If you have any questions about the camera, just let me know.
Tom
nice footage. How did you get stable footage with the running dog? Most other pocket 2 clips show bobbing with just walking pace.
Hi Ed! Thanks for reading the article and for your question. I just used the gimbal tilt lock mode and the footage turns out pretty good. For any micro jitters, I then ran the video footage through warp stabilizer in final cut pro. Honestly, if you don’t jerk the camera too much when you’re running, the footage you can capture is amazingly stable.
Should I get iPhone 11 or Pocket 2. I need to shoot cinematic shots. Which would be a better choice. Can iPhone 11 give better video than pocket 2?
Hi Dixon – thanks for your question! It really depends on what you’re looking for. Video quality is going to be very similar. The big benefit with the Pocket 2 is that it’s gimbal stabilized, so you can literally run with the camera and still get stable footage. However, the iPhone 11 can shoot very good video too. It’s not going to be as stable, but it’s pretty good and you have a filmmaking tool as you can download all sorts of apps to help you out.
very crisp footage. Have a difficult time getting clean footage even with the right settings (pro mode, 1/50 iso 200 awb). I use da vinci but do you have any tips on how you graded ? thanks
Hi Ed! Thanks for watching the video and sorry for the late reply! I’m not the best color grader so I try to keep it as easy as possible. For the DJI Pocket, I shoot in the D-Cinelike picture profile. Then in final cut pro, I adjust each clip first for exposure before applying a simple LUT.
hi Tom, thanks for making this in depth video. Question: If i was doing basic walk and talk videos is it worth for me to just keep the iphone 12 mini i just ordered to do those type of videos.
It seems more hassle free: record video, upload it directly from phone to youtube app.
where with OSMO id have to record vide and then splice files together, yada yada lol
thanks!
Hi Lisa! Thanks for your question and for watching the video! I think you’re exactly right. If you’re just going to do basic walk and talk videos, the iPhone 12 mini is really all that you need. The DJI Pocket 2 is nice, but only if you’re trying to create cinematic footage and would benefit from the features it has.
i appreciate the response and your great writing style and it was informative which is really important!
Hi! Thanks for reading the article and I’m glad it could help!
I want to record hiking and walking videos, but I don’t want to hold the camera in my hand while walking, can pocket 2 hello in this regard? What camera would best suit?
If you don’t want to hold the camera, i think a GoPro would be a better fit